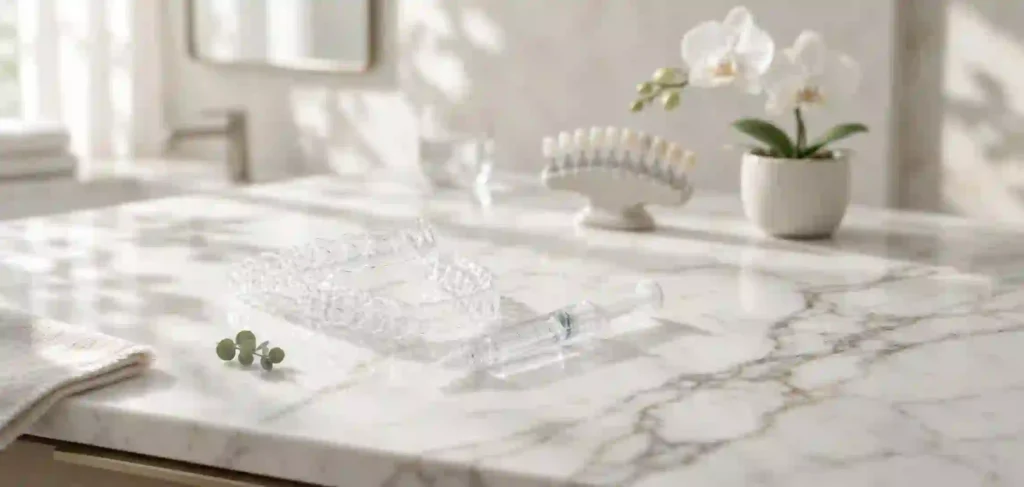
Your everyday confidence during talks and festivities is diminished by dull, stained teeth. Ineffective whitening strips slip across your teeth, abrasive pastes wear down enamel, and chairside dental treatments cost a small fortune. Professional whitening trays deliver dental-grade brightening directly to your home with unmatched safety and comfort. This clinical guide reveals how custom trays remove deep stains, eliminate sensitivity, and restore your radiant, youthful smile.
What Are Whitening Trays and How Do They Function?
Whitening trays represent custom-molded or pre-formed oral appliances designed to hold active bleaching gel securely against tooth enamel. They create an isolated micro-environment that prevents saliva from diluting the whitening chemistry while shielding delicate gum tissues from chemical contact. Dental clinicians consider tray-based delivery the gold standard for controlled, gradual, and long-lasting stain eradication.
The mechanism relies on active oxygenation. When you dispense peroxide-based gel inside the appliance, the bleaching agent permeates porous enamel prisms and enters the underlying dentin layer. The active peroxide releases free radicals that break apart double carbon bonds in chromogenic pigment molecules. As these pigmented compounds break down into smaller, colorless structures, your teeth reflect light differently and appear dramatically brighter.
Traditional strips often miss the curved contours of your premolars and interdental spaces. Trays solve this problem by wrapping around the entire dental arch and holding the gel against every exposed surface. Instead of simply the front six teeth, this continuous, consistent surface contact guaranties even shade advancement along the entire smile line.
Custom Dental Trays vs. Over-the-Counter Kits: A Critical Evaluation
Choosing the right appliance determines both your cosmetic success and your oral safety. Store-bought kits offer rapid convenience at a modest price point, yet they feature generic plastic arches that fit loosely. Professional dental solutions require custom impressions or digital intraoral scans to duplicate your exact bite architecture.
Custom trays fabricated by a dental laboratory provide an airtight peripheral seal around your gingival margin. This precise border prevents the bleaching gel from seeping onto sensitive gum tissue and stops saliva from inactivating the active peroxide. You achieve higher shade elevation with significantly less chemical gel per application.
Over-the-counter options typically use boil-and-bite thermoplastic trays or pre-filled flexible shells. These generic appliances frequently slip out of position and cause uneven pressure distribution across the arch. The poor marginal seal often leads to chemical gingivitis, patchy color distribution, and frustrating swallowing of displaced bleaching agent.
The Chemistry of Bleaching Gels: Carbamide Peroxide vs. Hydrogen Peroxide
Two main chemical substances are used in tray-based whitening methods to oxidize organic pigments. Understanding their differences helps you select the optimal formulation for your lifestyle and comfort thresholds. Both chemicals accomplish identical lightening, yet their breakdown rates and wear times differ substantially.
Carbamide peroxide acts as an extended-release whitening compound composed of urea and hydrogen peroxide. A standard 10% carbamide peroxide formulation breaks down into roughly 3.5% hydrogen peroxide and 6.5% urea. Urea stabilizes the solution and raises the oral pH, creating a gentler environment that reduces mineral loss during prolonged wear. Patients who whiten during sleep or those prone to severe sensitivity achieve superior comfort with carbamide peroxide solutions.
Hydrogen peroxide represents the direct, fast-acting bleaching agent. It breaks down rapidly within thirty to sixty minutes upon contact with oral warmth and moisture, releasing a concentrated surge of oxidizing radicals. Day-wear formulations commonly contain 6% to 9.5% hydrogen peroxide for thirty-minute daily sessions. While hydrogen peroxide produces faster daytime results, it demands strict adherence to wear times to avoid sudden dentin shock.
Step-by-Step Instructions: How to Use Whitening Trays Safely at Home
Proper application technique preserves your enamel health and maximizes your aesthetic outcome. Rushing through the setup or overfilling your trays wastes expensive gel and triggers gum irritation. Follow this proven clinical sequence every day of your treatment cycle to secure optimal brightening:
- Clean your teeth thoroughly before each session. Brush with a non-whitening, fluoride toothpaste for two minutes and floss between every contact point. Removing the sticky salivary pellicle and plaque biofilm ensures direct contact between the bleaching gel and your enamel crystals.
- Dry your dental arches with a clean facial tissue or soft cotton pad. Peroxide gel bonds to dry enamel far more effectively than wet surfaces. Moisture on the enamel dilutes the chemical concentration and compromises overall oxidation efficiency.
- Dispense a tiny pinpoint drop of bleaching gel into the inner facial wall of each tooth reservoir. You only need a droplet roughly the size of a sesame seed per tooth. Never fill the entire tray trough, because excess gel will squeeze out over your gingival margin upon insertion.
- Position the appliance gently over your dental arch and press it lightly against your teeth. Seat the tray straight down without biting it into place to avoid distorting the soft plastic borders. Inspect your smile in a mirror to confirm full seated alignment across all surfaces.
- Wipe away any displaced gel immediately with a clean cotton swab or dry finger. Removing excess gel from your marginal gum tissue prevents burning, blanching, and chemical inflammation. If you feel active stinging on your gums, rinse the area with lukewarm water right away.
- Remove the appliance carefully when your prescribed timer sounds. Rinse your mouth thoroughly with lukewarm water and brush away residual gel with a soft-bristled brush. Clean your mouth gently without aggressive scrubbing, as freshly bleached enamel remains temporarily porous.
Consistency produces superior results compared to erratic, extended sessions. Never wear your appliances longer than your dental clinician recommends, as longer contact time does not accelerate deep pigment clearance once the active peroxide exhausts its chemical potential.
How Long Does It Take for Whitening Trays to Produce Noticeable Results?
Visual brightening occurs progressively across a standard treatment cycle rather than in a single afternoon. Most patients observe an initial two-shade shift within three to five days of consistent daily application. Complete color stabilization typically requires ten to fourteen consecutive days of disciplined treatment.
Your baseline tooth shade and the molecular origin of your discoloration dictate the total duration. Mild surface yellowing from daily coffee or dietary habits lifts rapidly within the first seven days. Darker gray tones, tetracycline bands, and developmental fluorosis require extended treatment protocols lasting between four and eight weeks under professional supervision.
Enamel also undergoes transient dehydration while wearing appliances, making teeth appear artificially chalky immediately after removal. True stabilized color emerges roughly forty-eight hours after you conclude your complete whitening cycle. During this post-treatment window, minerals in your saliva rehydrate your enamel and lock in your new radiant shade.
Managing Tooth Sensitivity and Protecting Delicate Gum Tissue
Transient dentinal sensitivity represents the most common side effect during tray bleaching. Peroxide ions temporarily penetrate micro-porosities in your enamel and pass into open dentin tubules. These ions alter fluid movement inside the tubules and stimulate underlying pulp nerve endings, causing brief sharp sensations when exposed to cold air or beverages.
You can prevent and manage this discomfort by following targeted desensitization protocols. Switch to a toothpaste formulated with potassium nitrate and sodium fluoride two weeks before starting your whitening protocol. Potassium nitrate calms pulpal nerve fibers, while fluoride promotes remineralization by plugging open dentinal tubules.
- Apply remineralizing desensitizing gel containing amorphous calcium phosphate into your clean trays for twenty minutes between bleaching sessions.
- Alternate your whitening schedule by wearing the appliances every other day rather than every consecutive evening.
- Reduce your session duration from sixty minutes down to thirty minutes until nerve sensitivity subsides completely.
- Avoid icy refreshments, piping-hot drinks, and acidic foods like citrus fruits or carbonated waters throughout your active treatment cycle.
- Step down to a lower concentration gel, transitioning from a 16% carbamide peroxide down to a gentle 10% formulation.
Gingival irritation occurs almost exclusively from mechanical friction or chemical overflow. Trimming ill-fitting tray borders or wiping away excess gel immediately protects your soft tissues from blanching and soreness. If gum tissue appears white or irritated, pause whitening for twenty-four hours to allow natural tissue recovery.
Scalloped Trays vs. Non-Scalloped Reservoir Trays: Choosing the Ideal Design
Dental laboratories manufacture custom appliances using specific border geometries and relief patterns. Understanding the difference between scalloped and non-scalloped designs helps you select the most comfortable option for your oral anatomy. Both designs offer distinct clinical advantages depending on gel viscosity and gum architecture.
Scalloped trays feature hand-trimmed borders that follow the wavy natural contours of your gumline. Technicians trim the plastic approximately one half millimeter short of the gingival crest. This scalloped margin keeps high-concentration bleaching gels completely off delicate soft tissues, preventing chemical burns. Patients with sensitive gums or uneven gum margins benefit tremendously from scalloped construction.
Non-scalloped trays extend straight across the dental arch and overlap the attached gingival tissue by one to two millimeters. Dentists use this design primarily with lower concentration carbamide peroxide gels that do not injure soft tissues. The continuous border creates a superior suction seal, minimizing saliva infiltration and keeping the appliance firmly seated throughout overnight sleep.
Reservoirs represent small built-in spacer pockets created on the outer tooth surfaces of the plaster dental model. These hollow zones hold a greater reservoir of active gel directly against the center of the tooth crown. While classic dental techniques favored large reservoirs, contemporary high-viscosity gels remain stable without extensive spacing, allowing ultra-slim reservoir-free trays to perform with equal clinical brilliance.
What Stains Can Whitening Trays Remove (and What Stains They Cannot)?
Peroxide oxidation works wonders on specific organic discolorations while proving ineffective against inorganic structural defects. Knowing what dental trays can realistically achieve prevents disappointment and guides realistic cosmetic goals.
Extrinsic stains respond remarkably well to peroxide oxidation. These surface-level pigments stem from colored compounds called chromogens found in dark foods, beverages, and habits:
- Coffee, dark tea, and espresso tannins that bind to enamel proteins over years of morning consumption.
- Red wine polyphenols and dark berry anthocyanins that seep into microscopic enamel fissures.
- Tobacco tar and nicotine residues that deposit stubborn yellow-brown films across upper and lower arches.
- Daily food colorings, soy sauce, tomato marinara, and curry spices that gradually dull enamel luster.
Intrinsic stains reside deep within the internal dentin matrix and present greater clinical challenges. While aging-related dentin yellowing clears predictably with extended tray therapy, other deep conditions require professional cosmetic intervention:
- Tetracycline antibiotic staining produces dark gray or brown horizontal banding that requires months of supervised nighttime wear.
- Dental fluorosis presents chalky white spots or brown pitting caused by excessive childhood fluoride ingestion, often requiring resin infiltration or microabrasion.
- Traumatic tooth injury causes internal pulpal bleeding that darkens an individual tooth from within, necessitating endodontic treatment and internal non-vital bleaching.
- Restorative materials including composite bonding, porcelain veneers, and ceramic crowns do not respond to peroxide bleaching.
If you have visible tooth-colored restorations on your front teeth, whiten your natural teeth first. Once your natural enamel stabilizes at your desired shade, your dentist can replace old restorations to match your radiant new smile seamlessly.
Step-by-Step Cleaning and Maintenance Guide for Whitening Trays
Caring for your appliances prevents bacterial buildup, foul odors, and permanent plastic deformation. Delicate thermoplastic materials react poorly to extreme heat and harsh chemicals. Implementing a gentle daily sanitation routine ensures your appliances stay crystal-clear and hygienic for years of touch-up treatments.
Rinse your appliances under cool or lukewarm running water immediately upon removing them from your mouth. Gently brush both the inner and outer surfaces with a soft manual toothbrush and mild liquid dish soap or non-abrasive antibacterial liquid hand soap. Never use standard abrasive toothpaste to clean your appliances, as silica particles scratch the smooth plastic and create micro-grooves that trap plaque and foul-smelling oral bacteria.
Dry your appliances thoroughly with a clean microfiber towel before storing them. Trapping moisture inside a closed storage container promotes mildew formation and fungal growth. Keep your appliances in a ventilated plastic retainer case away from curious household pets, who frequently chew on soft plastic appliances.
Disinfect your appliances once a week by soaking them in a gentle effervescent retainer cleaner or a solution of equal parts cool water and white vinegar for fifteen minutes. Never submerge your appliances in boiling water, place them in the dishwasher, or leave them inside a hot vehicle. Excessive heat softens thermoplastic materials and warps the custom fit permanently.
The Financial Investment: Professional Dental Trays vs. Retail Alternatives
Evaluating the true value of tooth brightening requires weighing initial purchase costs against durability, safety, and long-term refill accessibility. While retail kits attract shoppers with low upfront prices, professional systems offer substantial economic and aesthetic value over time.
Over-the-counter boil-and-bite kits generally cost between twenty and sixty dollars. These kits bundle one or two tubes of generic gel with flimsy plastic mouthpieces. Because the generic trays lack custom retention, users frequently exhaust their gel supply quickly while managing inconsistent results and frequent gum inflammation.
In-office chairside laser or power bleaching procedures cost between five hundred and twelve hundred dollars per session. While chairside treatments provide immediate brightening in a single hour, color regression occurs rapidly without home maintenance. Most patients still require custom home trays to preserve their chairside shade over subsequent months.
Custom take-home trays from a dentist typically cost between two hundred and four hundred dollars, including custom impressions, laboratory fabrication, and initial medical-grade gel tubes. The custom-molded appliances last for five to ten years when handled properly. When you need a seasonal touch-up before a wedding or reunion, you simply purchase affordable refill gel syringes from your dental provider without paying for new appliances.
Comprehensive Comparison: Whitening Delivery Systems
Understanding the functional differences between available tray designs and retail bleaching alternatives empowers you to make an informed oral care decision. The following detailed comparison summarizes fit precision, active ingredients, comfort levels, and long-term value across all primary delivery methods:
| Feature / Metric | Custom Dental Trays | Boil-and-Bite OTC Trays | Pre-Filled Disposable Trays | Whitening Strips |
|---|---|---|---|---|
| Fit Accuracy | Exact 1:1 anatomical impression | Moderate generic mold | Loose universal fit | Flat flexible plastic strip |
| Marginal Gum Seal | Airtight scalloped or straight seal | Poor marginal adaptation | None; loose liquid contact | None; overlaps gum tissue |
| Active Peroxide Agent | 10%–22% Carbamide / 6%–9.5% HP | 3%–10% Hydrogen Peroxide | 6%–10% Hydrogen Peroxide | 6%–14% Hydrogen Peroxide |
| Saliva Contamination | Extremely low (gel stays active) | High (rapid wash-out) | High (rapid wash-out) | Moderate (slips easily) |
| Gum Irritation Risk | Minimal (isolated margins) | Moderate to high | High (gel migration) | Moderate (frequent edge burn) |
| Average Treatment Time | 10 to 14 days | 14 to 21 days | 7 to 10 days | 14 to 20 days |
| Shade Elevation | 6 to 9 shades lighter | 2 to 4 shades lighter | 2 to 4 shades lighter | 3 to 5 shades lighter |
| Appliance Lifespan | 5 to 10 years | Single treatment cycle | Single use per tray | Single use per strip |
| Long-Term Refill Cost | Low ($25–$40 for gel refills) | Full replacement kit needed | Full replacement kit needed | Full box purchase needed |
Clinical observations consistently confirm that custom dental appliances deliver the highest shade elevation while maintaining superior periodontal safety. Their anatomical precision keeps active peroxide concentrated against enamel crystals while excluding diluting saliva enzymes.
Preserving Your Bright Smile: The Long-Term Whitening Diet and Touch-Up Protocol
Completing your active bleaching cycle represents half the journey toward lasting aesthetic success. Freshly whitened enamel remains porous and vulnerable to chromogenic pigment absorption for forty-eight hours post-treatment. Protecting your investment requires strategic dietary choices and a structured touch-up regimen.
Adhere strictly to a “white diet” during your active treatment and for two full days following your final session. Consume foods that contain zero dark artificial dyes or intense natural pigments:
- Skinless chicken breast, roasted turkey, white fish, and egg whites.
- Steamed cauliflower, peeled potatoes, white rice, and plain pasta with light olive oil or white garlic sauce.
- Skim milk, plain yogurt, cottage cheese, and clear water.
- Bananas, peeled apples, and crustless white bread.
Avoid coffee, dark colas, red wine, soy sauce, mustard, tomato sauces, and dark chocolate during this vulnerable forty-eight-hour stabilization window. If you must drink morning iced coffee or tea, sip through a straw positioned toward the back of your palate to bypass front enamel surfaces completely. Rinse your mouth thoroughly with clean water immediately after consuming any colored beverage.
Schedule maintenance touch-ups every four to six months to neutralize everyday stain accumulation. You do not need to repeat the full two-week protocol. Wearing your existing appliances with fresh gel for one or two consecutive evenings easily restores your maximum baseline shade.
Evidence-Based Dental Insights: What the Clinical Literature Confirms
Dental scientists have investigated tray-based tooth bleaching for more than three decades. When evaluating safety and efficacy, clinicians reference peer-reviewed literature rather than commercial advertising claims. Three primary scientific bodies provide the definitive evidentiary foundation for home bleaching safety:
First, the American Dental Association Council on Scientific Affairs confirms that 10% carbamide peroxide applied in custom appliances is safe and remarkably effective for vital tooth bleaching. Their comprehensive safety evaluations show that custom tray delivery produces zero irreversible enamel degradation or permanent pulp pathology when applied according to instructions.
Second, extensive randomized clinical trials published in the Journal of the American Dental Association demonstrate that custom-fitted appliances yield significantly higher patient compliance and superior shade progression compared to generic retail alternatives. The journal’s long-term follow-up studies confirm that color retention remains stable for over eighteen months following a standard two-week protocol.
Third, a comprehensive systematic review conducted by the Cochrane Database of Systematic Reviews evaluated home-based chemically-induced whitening systems across thousands of test subjects. The Cochrane researchers concluded that tray-based peroxide systems consistently lighten intrinsic and extrinsic stains with high patient satisfaction. Their findings emphasize that mild, transient sensitivity and gingival irritation represent the only frequent side effects, both of which resolve spontaneously upon treatment cessation.
Frequently Asked Questions About Whitening Trays
How many hours a day should you wear whitening trays?
Wear time depends entirely on your gel’s chemical formulation and peroxide concentration. Formulations with 10% to 16% carbamide peroxide require two to four hours of daily wear, or you can safely wear them overnight while sleeping. High-potency hydrogen peroxide gels ranging from 6% to 9.5% work rapidly and require only thirty to sixty minutes per day. Never exceed your dental clinician’s exact timing instructions.
Can whitening trays damage tooth enamel or dental fillings?
Clinical studies verify that dental-grade peroxide gels delivered in custom appliances do not erode enamel or weaken tooth structure. Peroxide targets organic chromogenic molecules without demineralizing inorganic hydroxyapatite crystals. Furthermore, bleaching agents do not degrade existing composite fillings, porcelain crowns, or dental amalgam, although they will not lighten restorative materials either.
How long do results from whitening trays last?
Brightening outcomes typically last between twelve and twenty-four months depending on your personal dietary habits and oral hygiene routine. Patients who consume black coffee, red wine, or tobacco experience faster color regression than those adhering to preventive hygiene habits. Performing a brief one-night touch-up every four to six months keeps your smile continuously radiant without repeating a full protocol.
Can you wear dental bleaching trays in your mouth overnight while sleeping?
You can safely wear appliances overnight only when using low-concentration 10% or 16% carbamide peroxide gels. Carbamide peroxide releases its active oxidizing power slowly over a six-to-eight-hour window, making it ideal for nocturnal wear. Never sleep in appliances loaded with hydrogen peroxide gels, because their rapid chemical breakdown triggers intense overnight sensitivity and gum irritation.
Why do teeth look chalky or blotchy right after removing the trays?
Teeth appear temporarily chalky or uneven immediately after tray removal due to mild enamel dehydration. Enamel loses a small percentage of water during peroxide contact, causing light to scatter irregularly across surface micro-structures. Your natural saliva rehydrates the enamel prisms within twenty-four to forty-eight hours, blending your smile into a uniform, brilliant shade.
Are custom whitening trays better than standard whitening strips?
Custom appliances offer vastly superior coverage, comfort, and gum protection compared to flat retail strips. Strips only contact the flat facial surfaces of your front six to eight teeth, frequently missing interdental corners and posterior premolars. Custom appliances conform precisely to your unique dental anatomy, ensuring comprehensive, edge-to-edge shade elevation without shifting or burning your gums.
Step Forward and Claim Your Radiantly Confident Smile
A luminous, bright smile transforms your self-image, enhances your social interactions, and projects natural vitality in every setting. Investing in professional whitening trays gives you complete control over your aesthetic transformation from the comfort of your home. You eliminate the guesswork of slippery strips and avoid the harsh discomfort of generic one-size-fits-all retail kits.
Schedule a consultation with your dental provider this week to capture your custom impressions. Begin your personal transformation with clinical-grade materials engineered specifically for your unique smile. Take decisive action today, apply your personalized whitening system with confidence, and let your brightest smile shine through every room you enter.